

|
|
|
Model Level Logger
|
Model Level Logger
IntroductionThe model level logger is a part of the modeling language, and is set using the annotation @log in the cmp file. It can trace changes in a desired port value, a variable value and an automaton state. In addition, the logger supports logging a whole component at once which means tracing all component's ports, values, and automaton. The logger output is viewed on a PC using a Console Viewer, which is as a part of our IDE. It extends an open-source PC tool by leJOS called NXJConsole that provides a basic interface of exchanging messages between PC and LEGO MINDSTORM using USB and/or Bluetooth. Our extensions include optionally saving the log to file and showing it on screen In addition to unique adaptations in log entries such as millisecond level timestamp, type of element (port/var/automaton) etc. Console ViewerThe Console Viewer runs on PC as a java application and shows the log of the robot in real time. The connection between the robot and the PC could be via USB and/or BlueTooth, and one should choose that using the radio button. The Console Viewer can show the output of the LCD screen of the robot. To do that check "show remote LCD screen". Logs will be viewed on screen and will be saved to a file according to the checkboxes "Log to file on path" and "Log to screen". In case of logging to a file, a path shoul be supplied using the textbox. Filename will be '<RobotName> <Date> <Time>.txt'. For Example: "Platoon 08.04.2013 165948.txt". When running a robot with a @log annotation, the LCD screen of the robot will show "Remote Console..." - This means that the robot waits for the Console Viewer to connect to the robot. Clicking "Connect" will fill up "Name" and "Addr" automaically, and connect to the robot which will start sending logs to the Console Viewer according to the @log annotation. Each log entry consists of: For example:
First entry logs incoming port blink of component BlinkLEDControl, after 28ms. Value of port goes from false to true. Console Viewer of the model level logger: 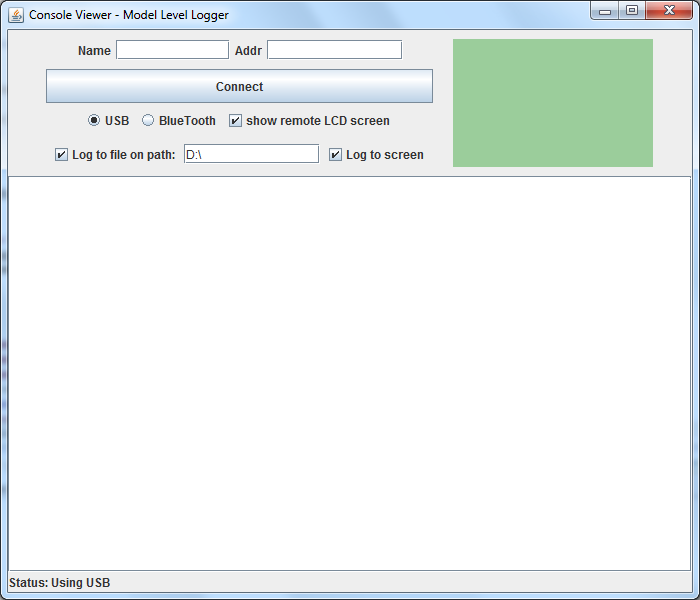
DownloadConsole Viewer is available to download from here. @log AnnotationAs explained, @log can be set on ports (incoming/outgoin), variables, automaton and component. We will present an exmaple for each one, including cmp model file, and log output. In each cmp file, the @log annotation is highlighted in red for your convinience.@log PortIn the following example, we log port led_on in component BlinkLEDControl which is an outgoing port. cmp file: Log output: 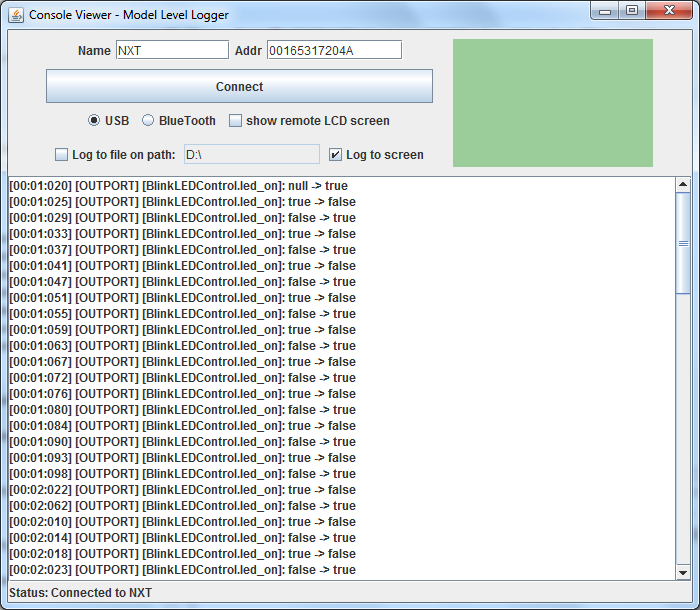
@log VariableIn the following example, we log variable led_on_integer in component BlinkLEDControl. cmp file: Log output: 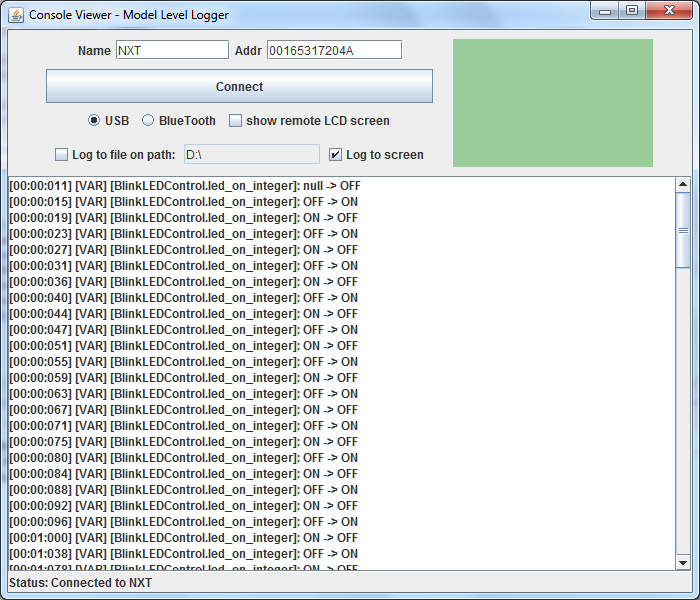
@log AutomatonIn the following example, we log automaton state of component BlinkLEDControl. cmp file: Log output: 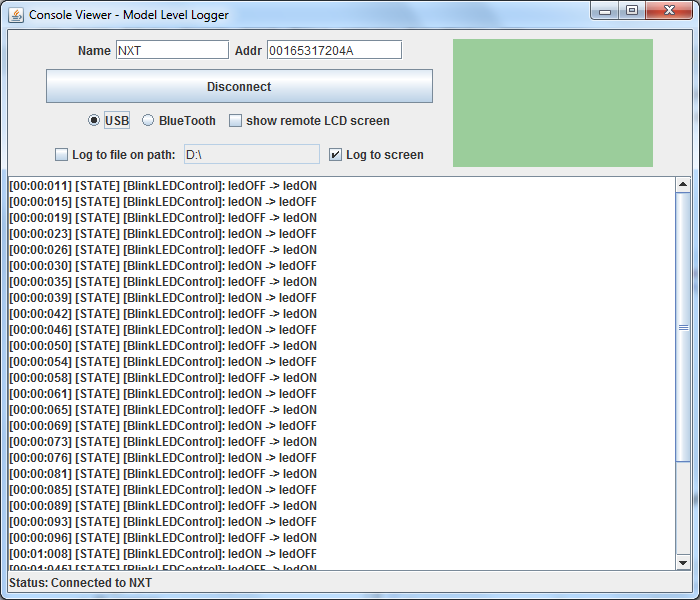
@log ComponentIn the following example, we log component BlinkLEDControl. Logging a component is as if we used @log annotation on every port/variable of the component and on component's automaton. cmp file: Log output: 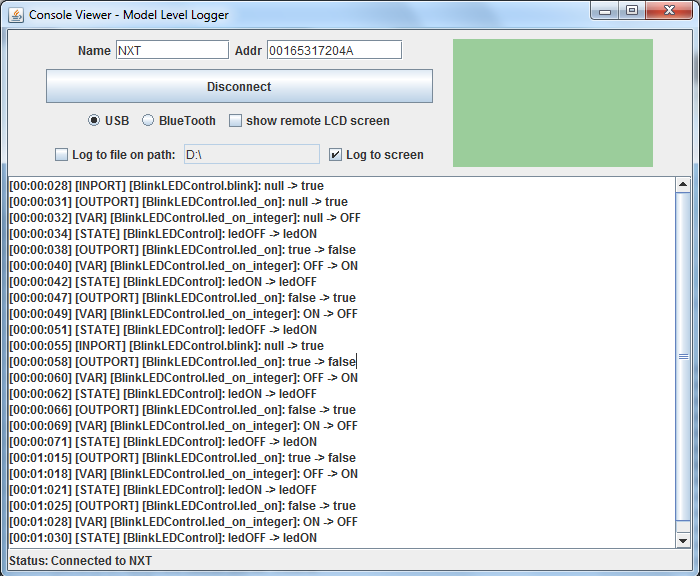
Troubleshooting |