|
Setup Development Environment
|
Setup Development Environment
Download Source Files
Project source files are avilable on https://smlab.unfuddle.com. Please refer to Dr. Shahar Maoz to get an access.
Back to top
Environment Installation
Following these instructions one can build a development environment from scratch:
Eclipse and Xtext
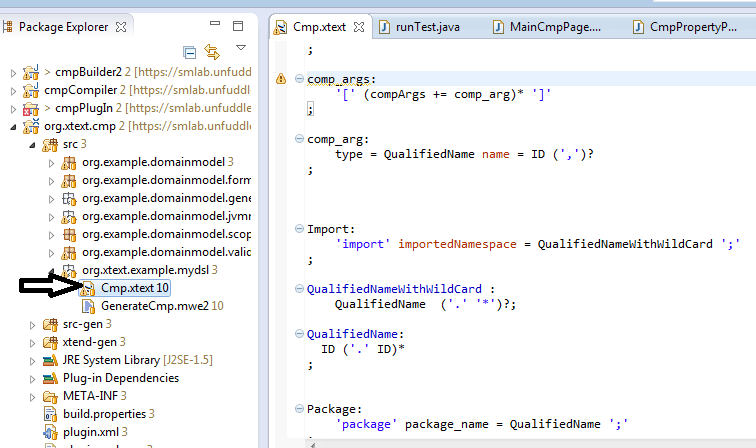
Install eclipse Xtext from installation site www.eclipse.org/Xtext/download.html. For the Cmp framework project, the eclipse Juno has been used – that is eclipse 4.2. The development environment we've used includes 4 eclipse projects that are automatically created when starting a new Xtext project using the intended wizard (the details on each one may be found in the Xtext documentation). The language's grammar is written in a special Xtext language (defined and explained in the Xtext doc.). The file to be edited is called 'cmp.xtext', in the 'org.xtext.cmp' project:
The grammar is fully defined using this file. The Xtext immediately provides an editor to your language, along with editor aspects such as outline, quick fix, content assist etc. these qualities may be suited to your by rewriting some of the classes in the other Xtext project, as described in the Xtext documentation. In addition to the Xtext projects, the cmp environment contains 3 projects:
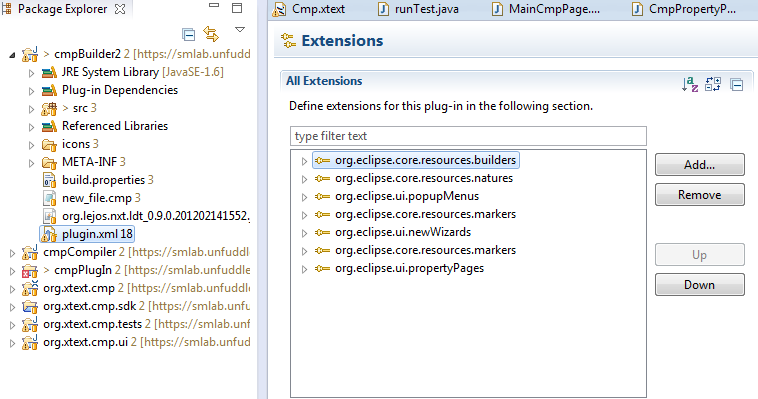
The cmp builder project – in this project the classes that extend the plug-in's extension points are defined. To see the existing extension points go open the file 'plugin.xml' of this project, and then choose the 'Extensions' tab: The cmp compiler project, which contains the actual compiler – the classes of this project are in charge of taking an input '.cmp' file, and outputting the appropriate '.java' files. The cmpPlugIn project – this project is necessary for exporting the framework as an Eclipse plug-in. I basically contains the properties for exporting the rest of the environment.
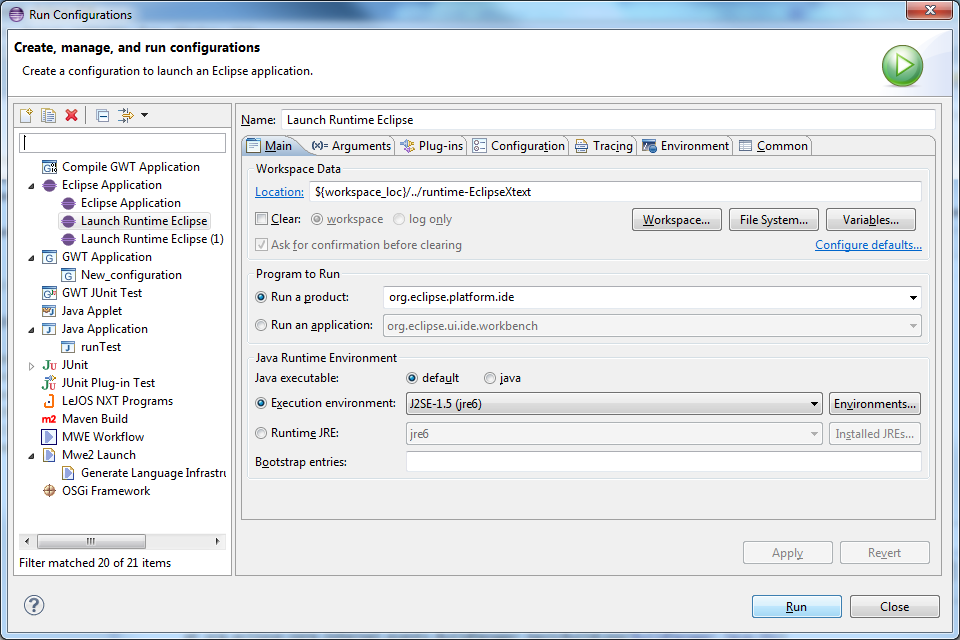
To 'test drive' the entire framework that has been created so far, select the 'run' menu, and then 'run configurations'. In this menu choose 'eclipse application' -> 'launch runtime eclipse', and click 'run': A new eclipse instance will be opened, containing all the features and the plug-ins defined in all the projects mentioned earlier.
Back to top
Plugin Export
To export the entire plug-in:
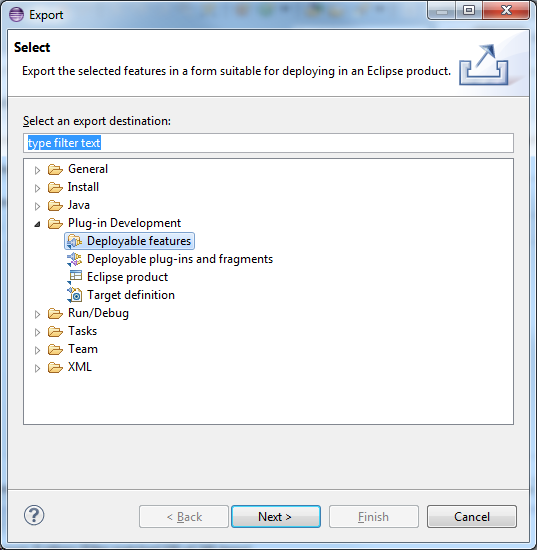
Right click on the plug-in project mentioned earlier, and choose 'export'. Choose to export as a 'deployable features':
In the next menu, choose the desired destination to which the plug-in will be exported (an empty folder at most times), and choose finish. The inserted folder now acts as a potential update address for installing the plug-in on a new eclipse instance. It can also be uploaded to a web server, and its internet address may be used as the update site for installing the plug-in.
Back to top
|